From our field notes
Flat tyre in Namibia: how many spare wheels, and what to do on a gravel road self-drive
Published 18 July 2026 · updated 18 July 2026 · 8 min read
By Clément Lacaille, publisher · our method
Before the accident, before the animal crossing the road at night, before the mechanical breakdown, there's the flat tyre: the most mundane — and the most common — roadside incident on any Namibia road trip. Over 85% of the country's road network is gravel or dirt, and the sharp shale of Damaraland, the ruts of Kaokoland or the corrugations of the Kalahari show no mercy to tyre sidewalls. It's not something to dread: it's a known scenario with a known procedure. Here's how many spare wheels to insist on when renting, how to cut the risk on gravel, and the step-by-step routine if it happens far from anywhere.
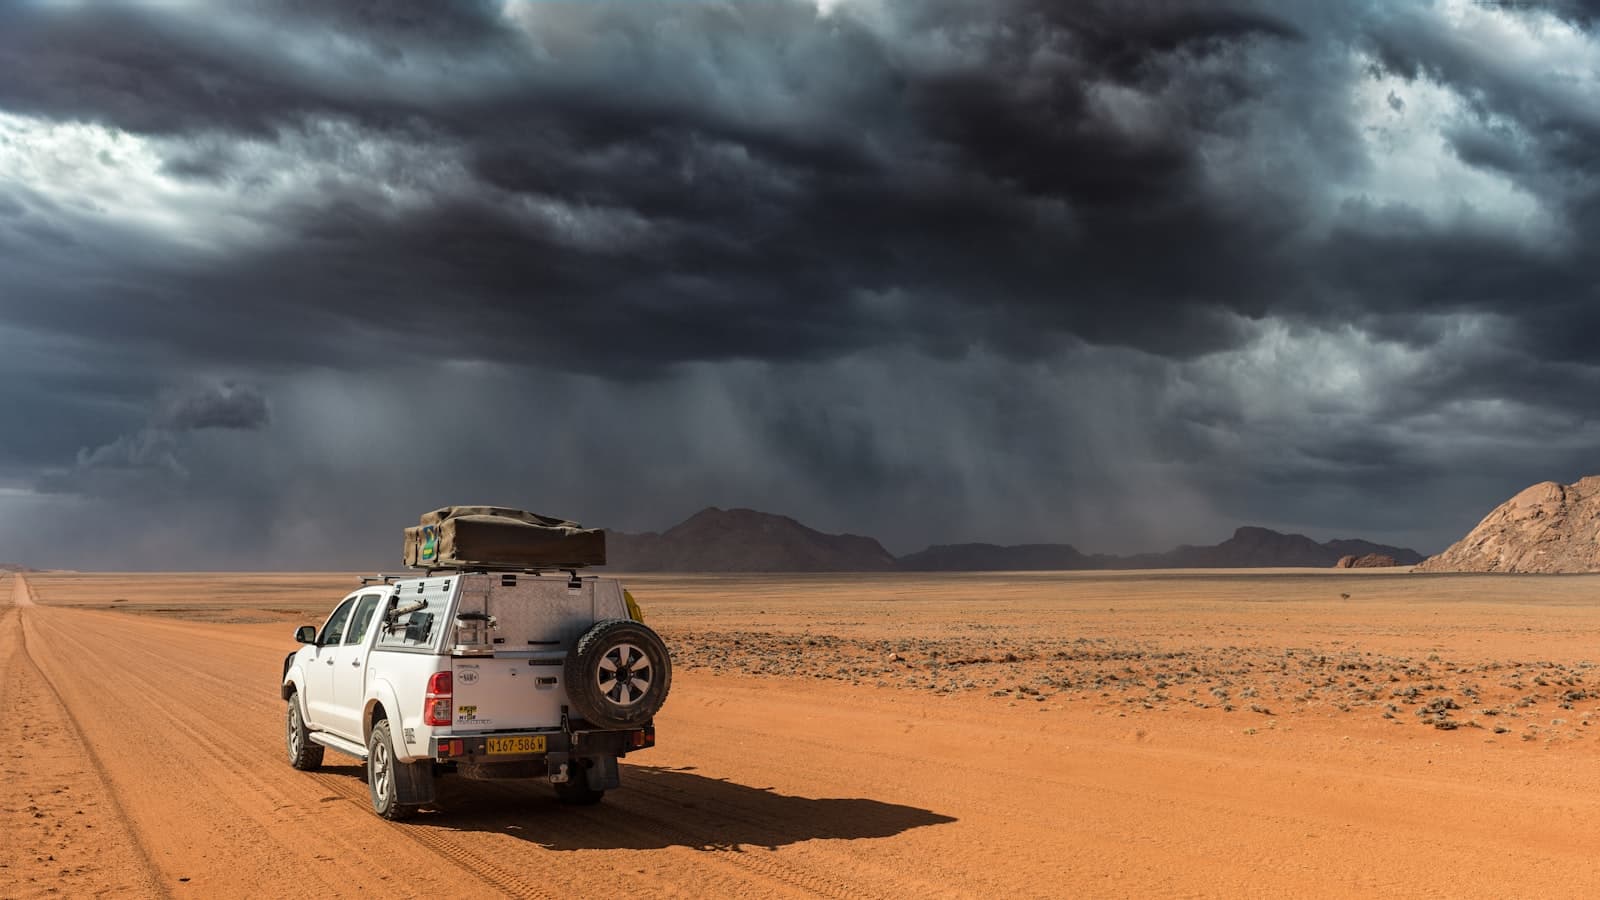
Why a flat tyre is incident number one on Namibia's gravel roads
Namibia has an enormous road network for a small population, and most of it — the well-known C and D roads, plus every 4x4 track heading into Kaokoland or the remote canyons — isn't tarred. This isn't fine sand: it's sharp shale, dolerite or quartz fragments that bite into tyre sidewalls on every tight bend or badly judged edge of the track.
Add the heat — which raises tyre pressure and softens the rubber as the day goes on — and corrugation, that hardened series of ripples from repeated traffic that shakes the wheel and can pop an under-inflated tyre off its rim. On a 15- or 21-day road trip covering 2,000 to 4,000 km, a flat tyre at some point is nothing unusual — it's actually one of the most likely incidents of the whole trip, well ahead of a real accident or a major mechanical breakdown.
One spare wheel or two? What to insist on when renting
This is THE question to settle before signing the contract, and our article on the pitfalls of renting a 4x4 in Namibia already touches on it: with most serious rental companies, two complete spare wheels (rim and mounted tyre) come as standard on 4x4s set up for self-drive, usually strapped under the chassis or on the rear door. Some entry-level models, or some cheaper rental companies, only supply one as standard, with a second available as an option.
The rule is simple: a single spare wheel is usually enough for a route that stays on well-maintained tarred and graded main roads (Windhoek, Swakopmund, southern Etosha). The moment the itinerary heads towards Kaokoland, the remote tracks of Damaraland, the Zambezi Region (Caprivi) or the deep sand stretches of the Kalahari, insist on both — the safety margin collapses fast if a second puncture happens with only one spare left, hours from the nearest town. Confirm this in writing at booking, not at the counter on departure morning.
The golden rule before leaving the tar: tyre pressure
The single most effective move to cut the risk of a flat costs nothing and takes five minutes: let a little air out of the tyres as soon as the tar gives way to gravel. Overinflated tyres on a stony track turn hard and brittle at the slightest impact against a sharp edge; slightly lower pressure lets the rubber absorb the shock and noticeably improves grip on corrugation and sand.
Most rental companies hand over a pressure guide when you collect the vehicle, with settings for tar, gravel and deep sand — ask for it explicitly if it isn't offered — plus a portable compressor to reinflate before rejoining a tarred road. Don't skip that last step: driving any distance on tar with under-inflated tyres wears the rubber prematurely and can make a tyre overheat.
A flat tyre on gravel: the step-by-step procedure
First move: don't brake hard. Ease off the accelerator, hold the wheel firmly — a rear tyre deflating suddenly can pull the vehicle slightly off line — and pull over gradually onto a flat, stable shoulder, away from the track and, where possible, not just after a bend or a rise that would hide the vehicle from other drivers.
Place the warning triangle well back, set the handbrake, chock the wheels opposite the one you're changing with a rock or a wheel chock, and set the jack on firm ground — the base plate supplied with the tool kit exists precisely to stop it sinking into loose gravel. Loosen the wheel nuts a quarter turn before raising the vehicle, never after: the tyre still on the ground gives the resistance needed to break them free.
Once the wheel is changed, tighten the nuts in a star pattern (never around the circle) for even pressure, and check the torque again after a few kilometres — the track's vibration loosens nuts faster than a smooth road does. Then head to the nearest town to get the flat tyre repaired or replaced: better to drive a short distance on the spare than to carry on with no spare at all for the rest of the trip.
A second flat, far from anywhere: handling it without signal
This is exactly the scenario the second spare wheel is meant to cover, but sometimes it's the plug repair kit and compressor — often supplied with the vehicle — that save the day, patching a simple puncture temporarily without removing the wheel. If nothing works, the priority shifts to staying visible and reachable: stay near the vehicle rather than walking off to look for help, since it's far easier to spot than a lone figure on the track.
On the main gravel roads (C and D roads), another vehicle passing within a few hours during daylight is fairly likely. On the most isolated 4x4 tracks of Kaokoland or off the beaten path, it's a different story: this is exactly the kind of route where a satellite communicator or a rented satellite phone earns its keep, alongside the rental company's 24/7 assistance number kept somewhere offline (a photo, a printed copy). Telling a lodge or campsite the exact route planned before setting off on an isolated track remains one of the simplest and most effective safety habits, even today.
Who pays for the flat tyre? The insurance point to check before leaving
This is a classic trap of Namibian car hire, already covered in our article on the pitfalls of renting a 4x4: even with a "zero excess" policy, tyres, the windscreen and windows are excluded by a fair number of rental companies, precisely because they're the parts gravel attacks hardest. Ask for written confirmation of "tyre & windscreen cover" if it isn't included by default — otherwise every damaged tyre stays entirely at your expense.
One more thing to plan for: keep the punctured tyre (even if it's beyond repair) and get a receipt if you have it repaired along the way — some rental companies charge a fee if a spare wheel is returned used with no proof of repair. It's an administrative detail, but it saves an unpleasant surprise on the deposit when the vehicle is handed back.
The checklist to run before hitting the road
At the rental counter, then in the vehicle's boot, a few minutes are enough to check the anti-puncture kit is complete and in good shape — better to find out now than on an isolated track late in the day.
| Equipment | What to check | Why it matters |
|---|---|---|
| Two spare wheels | Rim and tyre in good condition, properly inflated, securely strapped | Essential the moment the route leaves the main roads |
| Jack and base plate | Working jack, plate or board for soft ground | Gravel and sand let an unsupported jack sink in |
| Wheel brace or wrench | Fits the vehicle's nuts, with an extension bar if needed | 4x4 wheel nuts are often torqued down hard |
| Portable compressor | Working cigarette-lighter or battery connection | To reinflate before rejoining tarred roads |
| Plug repair kit | Present, complete, with instructions | Fixes a simple puncture without removing the wheel |
| Triangle and gloves | Present and reachable without emptying the whole boot | Safety and speed when stopped on the roadside |
Free excerpt
The 7 mistakes to avoid on a first Namibia road trip
A real excerpt from our Namibia expertise: 4x4 insurance, gravel speed, NWR bookings, season, fuel, Etosha… The 7 costly mistakes, and the right reflex for each. Instant access, with the current promo code.
No time to do it yourself?
A professional can take care of it: tailor-made trip, equipped 4x4 rental or a local guide. Describe your plans and, with your consent, we pass them on to partner professionals.
1. What you need
Before you go
Readers' questions
Do I really need to insist on two spare wheels for any Namibia itinerary?
Not for a route that stays on the well-maintained main roads around Windhoek, Swakopmund or southern Etosha, where one good spare wheel is usually enough. But the moment the itinerary heads towards Kaokoland, the remote tracks of Damaraland, the Zambezi Region (Caprivi) or the Kalahari, two spares become the recommended standard — the safety margin after a second puncture, far from any town, is otherwise very thin.
Should tyre pressure be lowered on every gravel road in Namibia?
On gravel and corrugation, slightly lower pressure improves grip and cuts the risk of a flat by letting the tyre absorb impacts instead of taking them head-on. Most rental companies hand over a pressure guide by surface type when you collect the vehicle. Reinflating before rejoining a tarred road is essential afterwards, or the rubber wears out prematurely.
Is a flat tyre covered by 4x4 rental insurance?
Not always, even with a "zero excess" plan: many rental companies explicitly exclude tyres, the windscreen and windows from their cover, since they're the parts most exposed to gravel. Check for written confirmation of tyre and windscreen cover before leaving, and keep a receipt if you get a tyre repaired along the way.
What should I do after a second flat tyre with no mobile signal?
A plug repair kit and a compressor, often supplied with the vehicle, can sometimes patch a simple puncture with no spare wheel needed. Otherwise, stay near the vehicle to remain visible, keep the rental company's 24/7 assistance number saved offline, and on the most isolated Kaokoland tracks, consider a satellite communicator. Telling a lodge the planned route before setting off on an isolated track remains one of the most effective precautions.